
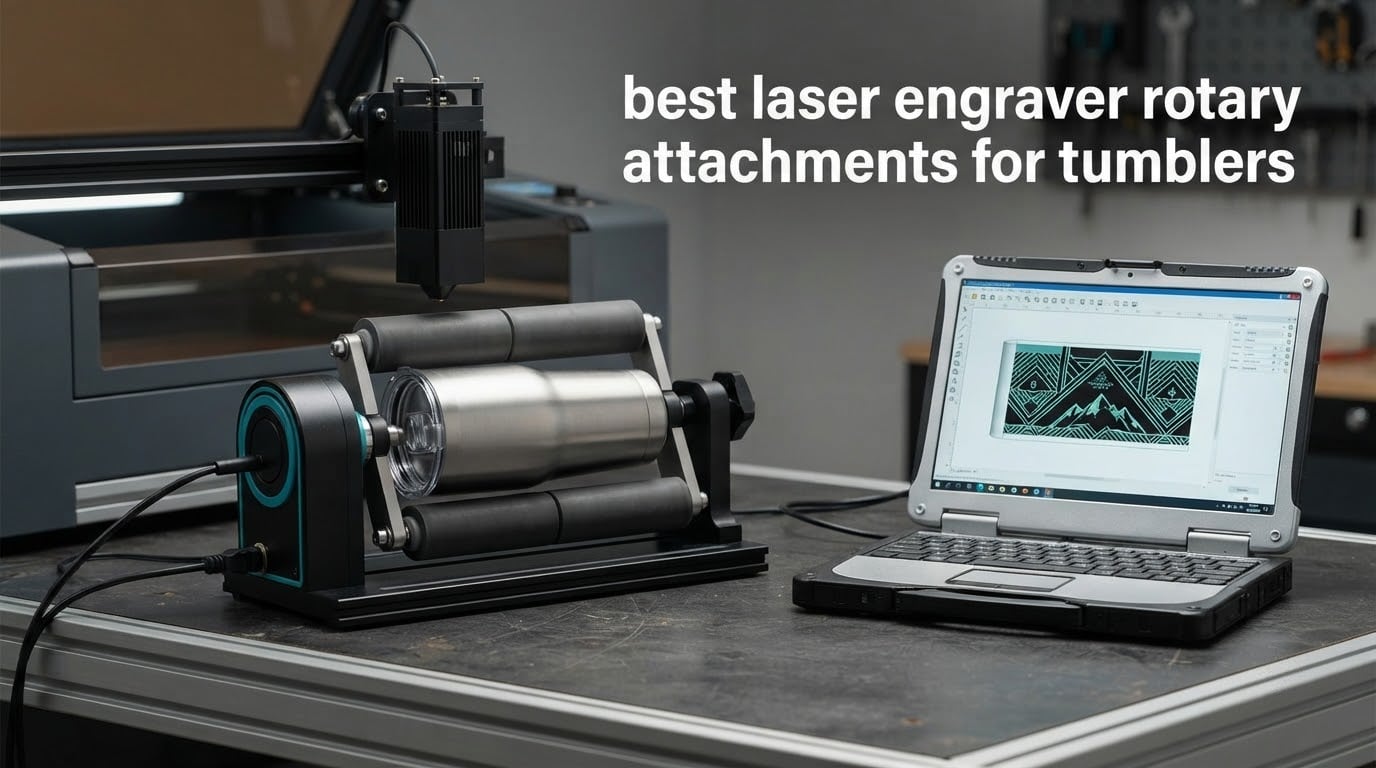
A laser engraver rotary attachment is a motorized add-on that grips a cylindrical object and spins it in precise sync with the laser, so the beam stays at one fixed focus distance while the surface travels beneath it. That single change is what makes a 360-degree wrap on a tumbler, bottle or ring possible at all, and it is why a rotary is effectively mandatory the moment your work stops being flat.
Flat engraving on a curved surface fails in a predictable way. The focal distance changes continuously as the beam crosses the curve, so line edges soften, depth varies across the circumference, and a full-wrap design drifts into a visible seam. A rotary holds the radius constant and feeds the software a rotation ratio, which is the difference between a smeared stripe and a crisp logo.
We put ten of the current best laser engraver rotary attachments for tumblers through the same comparison: axis type, diameter coverage, jaw or roller configuration, motor and speed data, machine and software compatibility, and what actually ships in the box. Every pick below carries its own product card with the honest drawbacks, because the difference between a good rotary and a frustrating one is almost always a compatibility detail rather than a headline specification.
If you are still working out the machine side first, our earlier guide to rotary laser attachments for tumbler engraving covers the entry-level pairing question. This roundup goes deeper on the attachments themselves.
Table of Contents
- Top 3 Laser Engraver Rotary Attachments for Tumblers (October 2026)
- 10 Laser Engraver Rotary Attachments for Tumblers (October 2026)
- 1. Ortur Laser Rotary Roller – The Most Proven Budget Rotary
- 2. xTool RA2 Pro – The Most Capable Single Attachment
- 3. Longer Rotary Roller Series – The Best General-Purpose Buy
- 4. ORTUR YRC1.0 – Best Rotary for Rings, Balls and Odd Shapes
- 5. Creality Laser Rotary Roller – Best Match for Creality Machines
- 6. xTool RA3 – Best Rotary for Quick Changes and Mixed Projects
- 7. Creality Rotary Roller Pro – Best Grip Set for Shaped Workpieces
- 8. ACMER M4 – Widest Roller Range in the Roundup
- 9. OMTech 3-Jaw Chuck Rotary – The Choice for a CO2 Shop
- 10. Woxcker ARot8 – Feature-Rich Kit With a Narrow Compatibility Window
- Which Type of Rotary Attachment Do You Need?
- How to Set Up and Calibrate a Rotary Attachment
- Why Is Your Rotary Engrave Blurry or Seamed?
- How to Choose a Laser Engraver Rotary Attachment
- Frequently Asked Questions
- Do I need a rotary attachment to engrave a tumbler?
- What type of laser is best for tumblers?
- What is the best tumbler for laser engraving?
- Which laser engraver is best for tumblers?
- How do I use a laser engraver on a tumbler?
- Why is my rotary tumbler engraving blurry?
- How much should I charge to laser engrave a tumbler?
- Conclusion
Top 3 Laser Engraver Rotary Attachments for Tumblers (October 2026)
These three cover the most ground for the widest range of machines. The Ortur roller leads on proven reliability and the deepest owner base, the xTool RA2 Pro is the most capable single attachment we found, and the Longer roller is the strongest general-purpose buy.

Ortur Laser Rotary Roller
- 7-step diameter adjustment from 8mm to 110mm
- Works with LaserGRBL and LightBurn
- Compact 2.4 pound Y-axis roller module

xTool RA2 Pro 4-in-1
- Roller chuck sphere and ring modes
- Up to 360 degrees per second vector speed
- 0.45 degree minimum angle

Longer Rotary Roller Series
- Two wiring harnesses included
- 360 degree auto-rotating drum
- Adjustable height range
10 Laser Engraver Rotary Attachments for Tumblers (October 2026)
Every attachment below uses the Y-axis to drive rotation, so the bed becomes unavailable while it is mounted. The real differences are diameter range, whether it grips by roller or by jaw, and which machines and control software it will actually talk to.
| Product | Specifications | Action |
|---|---|---|
| Ortur Laser Rotary Roller |
|
Check Latest Price |
| xTool RA2 Pro 4-in-1 |
|
Check Latest Price |
| Longer Rotary Roller Series |
|
Check Latest Price |
 ORTUR YRC1.0 Rotary Chuck ORTUR YRC1.0 Rotary Chuck |
|
Check Latest Price |
 Creality Laser Rotary Roller Creality Laser Rotary Roller |
|
Check Latest Price |
 xTool RA3 Smart MagSwap Rotary xTool RA3 Smart MagSwap Rotary |
|
Check Latest Price |
 Creality Rotary Roller Pro Creality Rotary Roller Pro |
|
Check Latest Price |
 ACMER M4 Laser Rotary ACMER M4 Laser Rotary |
|
Check Latest Price |
 OMTech 3-Jaw Chuck Rotary OMTech 3-Jaw Chuck Rotary |
|
Check Latest Price |
 Woxcker ARot8 4-in-1 Woxcker ARot8 4-in-1 |
|
Check Latest Price |
1. Ortur Laser Rotary Roller – The Most Proven Budget Rotary
Best for: anyone who wants a dependable first rotary for a diode machine, especially if you engrave tumblers, cans, bottles or pipes in quantity and want the widest diameter range per step.
ORTUR Laser Rotary Roller, 360° Laser Engraver Y-axis Rotary Module for Engraving Cylindrical Objects Cans, 7 Adjustment Diameters, Min to 8mm, Compatible with Most Laser Engraving Machines
7-step diameter range 8mm to 110mm
LaserGRBL and LightBurn
2.4 lb roller module
Pros
- Seven adjustment steps cover roughly 8mm to 110mm
- Handles cups bottles pipes bowls and tubes as well as small cylinders
- Works with LaserGRBL and LightBurn on Windows Mac and Linux
- Largest owner base of any rotary in this roundup at 723 reviews
Cons
- Other machine brands need the blue and green wires swapped at one end of the cable
- Roller-only grip is less flexible than a jaw chuck on irregular shapes
The Ortur YRR is the attachment I recommend first to almost anyone, and the reason is the review history rather than a specification sheet. Seven hundred and twenty-three ratings at 4.4 stars is by far the deepest owner base in this category, and 72 percent of those ratings are five stars. That kind of volume usually means the design has stopped surprising people, which matters when the alternative is a costly blank ruined mid-batch.
Mechanically it is a simple proposition: a rubber-coated roller pair on an adjustable arm, driven off the Y-axis motor. Seven discrete steps take the roller spacing from about 8mm out to 110mm, which covers pens, pipes, small jars, cans and most travel tumblers without buying a second attachment.
The thing that catches new owners is not the hardware, it is the cable. If your engraver is not an Ortur, you may need to swap the blue and green wires at one end before the machine will drive it, which takes about two minutes with a screwdriver but is not mentioned in most quick-start guides. Once that is done, LightBurn and LaserGRBL both recognize it as a standard rotary.
Owners consistently point out that the roller format is less forgiving than a jaw chuck on odd shapes. A tapered tumbler or a cup with a handle can sit slightly off-axis, and the roller will happily spin it anyway. If your work is mostly straight-sided cylinders, this is a non-issue.
How it handles a full wrap in practice
The roller self-centers well enough on a straight tumbler wall that the finish is even around the circumference, and the wide step range means most people can find a setting within a fraction of a millimeter of true diameter. Where it is not the answer is a workpiece with a taper or a raised base, because a roller cannot correct the tilt the way a jaw can.
If your tumblers are powder-coated stainless drinkware with straight walls and a flat base, this module handles them cleanly. For tapered bottles or handled mugs, look at a jaw chuck instead.
What to check before you buy
Check your machine brand first, because the wire swap is the single most common reason a first rotary goes straight into a drawer. Confirm your control software is LightBurn or LaserGRBL based, since that is what the module is built around.
Also measure your tallest workpiece against the frame height. The roller sits relatively low, and very tall mugs need the support raised rather than forced in.
2. xTool RA2 Pro – The Most Capable Single Attachment
Best for: xTool owners who want tumblers, glassware and rings from one module without buying a separate sphere or ring fixture.
xTool RA2 Pro for xTool S1, F1, F1 Ultra, P2, M1 Ultra and Most Laser Engraver (Must with Riser), Y-axis Rotary Roller for Engraving Cylindrical Objects, Wine Glass, Tumbler, Engraver Accessory
Roller chuck sphere and ring modes
360 deg/s max vector speed
0.45 deg minimum angle
Pros
- Four-in-one design covering roller chuck sphere and ring work
- Soft-pad jaw chuck grips a spread of diameters without slipping
- 0.45 degree minimum angle suits detailed small text
- Pre-assembled plug-and-play setup with height and chuck diameter adjustment
- Anodized aluminum alloy construction
Cons
- Short frame means tall mugs need the support height raised
- Chuck jaws sit low which limits some larger workpieces
- A riser is required for full function
The RA2 Pro carries the highest rating of the ten we reviewed at 4.6 stars across 396 reviews, and it earns that rating by collapsing four tools into one frame. The same body switches between a roller, a jaw chuck, a sphere module and a ring stud, so the same purchase covers a full-wrap tumbler and a baseball.
The specification that matters most for tumblers is the motor. Vector engraving speed runs up to 360 degrees per second with a 0.45 degree minimum angle, which is what lets a design with fine lettering finish a wrap without the small text dragging at the seam. The soft-pad jaws hold a tumbler firmly without marking the powder coat.
Owners report clean, centered results on tumblers, travel mugs and glassware, and a recurring theme in reviews is that it out-performs generic roller modules on the same machine. That comparison is doing a lot of work in the enthusiast community, because most cheap rotaries were never tested against a fixture with this much adjustment.
Compatibility is broad. It is listed for the xTool S1, F1, F1 Ultra, P2, D1 Pro and M1 Ultra, and for most other laser engravers, running under LaserBox Basic, LaserGRBL or LightBurn. The adjustment covers both Z-axis height and chuck diameter, so irregular cylinders and extra-long items are within reach.
The honest limitation is height. The frame is 7.4 by 3.7 by 18 inches and the chuck jaws sit low, so a tall mug needs the support raised before it will sit correctly. A riser is also listed as required for full function, which is worth budgeting for at the point of purchase.
What works well on this one
Fine detail on a curved surface is where this attachment earns its rating. A 0.45 degree minimum angle keeps small text from distorting near the start and stop point, and the soft jaws resist the slip that causes a wrap to wobble halfway around.
If you move between tumblers, wine glasses and rings, the multi-mode frame removes the usual temptation to print a second fixture or improvise one.
What to check before you buy
Measure your tallest mug and plan for a riser, since that is the configuration the manufacturer expects. Confirm which machine variant you need, because a listing for one xTool platform is not automatically the right one for another.
Also check your software. LaserBox Basic handles the auto-configuration, but if you have moved to LightBurn you will set the rotary parameters manually the first time.
3. Longer Rotary Roller Series – The Best General-Purpose Buy
Best for: owners of a Longer RAY5 or Laser B1 who also want the module to work on other brands, plus anyone engraving vases and bottles that sit taller than a tumbler.
Longer Rotary Roller Series,with Bracket, Y-Axis 360° Rotation for Laser Engraver Engraving Cylindrical Objects Tumblers Cans Cups Bottles, Compatible with 99% of Laser Engraver,Size 268 * 184 * 60mm
Two wiring harnesses included
360 degree auto-rotating drum
13.58 x 9.84 x 4.13 in
Pros
- Two wiring options cover RAY5 Laser B1 series and most other engravers
- 360 degree auto-rotating drum with stable positioning
- Adjustable height range from small trinkets to tall vases
- Bracket included and built for continuous use
Cons
- Black-head wiring must be swapped if the white-head cable does not work
- Drum design holds a narrower range of shapes than a jaw chuck
The Longer Roller is the pick I send people to when they own a machine from a brand nobody has built a bespoke fixture for. Two wiring harnesses ship in the box, one for the RAY5 and Laser B1 family and one broader lead, which removes the single most common compatibility hurdle at the price of a small extra cable swap.
The rotating drum is self-centering and the support column adjusts through a wide height range. That range is the reason it earns its spot on a tumbler list: it goes from a small pen to a tall vase without a second fixture, and the included bracket keeps the frame rigid under load.
Rated 4.4 across 222 reviews with 74 percent five-star ratings, this is a well-regarded module inside its category rather than an outlier. Owners of Longer machines rate it most warmly, but the review pattern shows it holds up on other brands too, particularly on cans and bottles where the drum keeps the part concentric.
Two wiring options is the practical headline. The primary lead works with the RAY5 and the B1 series, and roughly 80 percent of other engravers are covered by the second. When the second one does not work, the fix is swapping the black-head wiring, which owners report is a quick change.
As with all drum-style modules, the grip is geometrically simple. It centers a round, straight-sided part beautifully and does much less for a tapered bottle or a cup with a handle.
Where this module fits best
It is at its strongest on tall, straight-sided workpieces where roller-only modules usually struggle. A vase or a large bottle needs height the compact frames do not offer, and this one has it built in.
For tumblers, expect a clean full wrap as long as the wall is straight. Expect to re-measure the diameter setting for each new blank size, since the steps are not labeled in millimeters.
What to check before you buy
Identify which of the two harnesses your machine needs before you start, and keep the black-head swap in mind as a fallback. Confirm your control software runs GRBL, since the rotation parameters live there.
Check the drum surface for debris between jobs. A roller picks up coating powder and skin oil, and that transfer is the most common reason a clean wrap turns fuzzy halfway around.
4. ORTUR YRC1.0 – Best Rotary for Rings, Balls and Odd Shapes
Best for: makers who want a chuck that grips a tumbler, a baseball and a ring from the same frame, and who are willing to spend time experimenting with jaw positions.
ORTUR YRC1.0, Y-axis Rotary Chuck for Most Laser Engravers, Jaw Chuck Rotary, Y-axis Rotary Roller Engraving Module for Engraving Cylindrical Objects, Wine Glass, Tumbler, Ring
Chuck ring and sphere modes
1-120mm chuck range
1.69 kg aluminum frame
Pros
- One frame covers chuck rotary ring rotary and sphere rotary work
- Maintains precision and stability at 360 degrees per second
- Chuck covers 1-120mm with sphere 25-150mm and ring 11-100mm
- Works with Laser Explorer LaserGRBL and LightBurn
- Chuck key included in the box
Cons
- Jaw configuration across the multiple holes takes real experimentation
- Costs more than a roller-only module
The YRC1.0 is the pick for anyone whose product list is not just drinkware. In a single aluminum frame it combines a chuck rotary, a ring rotary and a sphere rotary, and the chuck itself covers 1mm to 120mm, which is wide enough for a pen at one end and a large tumbler at the other.
Stability is the claim that matters for tumblers, and it holds up in reviews. Buyers report consistent results on wine glasses, baseballs, bats and rings, with precision maintained at the full 360 degrees per second rotation speed. The included chuck key makes jaw changes a two-minute job rather than a teardown.
Setup is described as a four-step process, and the control software list is broad: Laser Explorer, LaserGRBL and LightBurn, across Windows, Mac and Linux. Lock type supports both closed-center and open-center work, which is useful when a design needs to sit at a known origin.
The learning curve is real and it is the main reason this does not sit higher in the ranking. With multiple jaw positions across several holes, the correct arrangement for a given diameter is not obvious on first assembly, and owners describe a period of trial and adjustment before results become repeatable.
The second drawback is straightforward economics. A jaw chuck costs meaningfully more than a roller module, and if every job you run is a straight tumbler, that money is not buying you anything you can use.
When a chuck beats a roller
A jaw chuck clamps a part at defined points, so it does not slide as the workpiece turns. That is the difference on tapered tumblers, handled mugs and anything where a roller would sit off-axis and slowly drift during a long wrap.
It is also the right tool for irregular or polygonal work, since each jaw can be set independently. If your order sheet includes anything other than a straight cylinder, this pays for itself quickly.
What to check before you buy
Set aside an hour for the first jaw configuration and test on scrap before a real blank. Measure your largest workpiece against the 120mm chuck capacity and the 150mm sphere range, since those are the hard limits.
Confirm your machine runs LaserGRBL or LightBurn and that you can give up the Y-axis bed for the duration of a job. There is no way around that trade with any Y-axis rotary.
5. Creality Laser Rotary Roller – Best Match for Creality Machines
Best for: Creality laser engraver owners who want a wide diameter range and a support module that handles a YETI-style tumbler without improvising.
Creality Laser Rotary Roller for Engraving Curved Surface Objects
7-level gear change 5mm to 120mm
Adjustable support module
24-month guarantee
Pros
- Seven gear levels cover cylinders from 5mm to 120mm
- Adjustable support module handles irregular shapes like Yeti cups and wine glasses
- Works with LaserGRBL and LightBurn
- Backed by a 24-month manufacturer quality guarantee
Cons
- Listed as compatible with Creality laser engravers only
- Needs a firmware parameter change before and after each use
The Creality Roller covers 5mm to 120mm across seven gear levels, and the piece that makes it interesting for tumblers is the adjustable support module. Creality markets it specifically for irregular cylinders including Yeti cups, wine glasses and bottles, and that is the shape most generic rollers handle worst.
At 4.3 stars across 90 reviews, with 69 percent five-star ratings, satisfaction centers on two things: the width of the diameter range and the support module. Both are physical traits you can verify before you buy, which is unusual in this category.
The two friction points are equally clear. The listing states compatibility with Creality laser engravers only, so anyone on a different brand should look elsewhere in this roundup. And the module requires a firmware parameter change before use, plus a change back afterward, which reviewers describe as an avoidable extra step rather than a real obstacle.
Control software is LaserGRBL or LightBurn, the same pair that covers most of the cheaper modules here. The construction is metal and plastic, and the unit arrives as a metal and plastic assembly with the gear selector exposed for adjustment.
Diameter adjustment at seven levels is coarser than a continuously adjustable arm, so plan to spend a few minutes finding the best step for each tumbler size rather than expecting a one-turn fix.
How the support module helps with drinkware
A wider double-sided support that follows a tapered body is the difference between a clean wrap and a part that rocks halfway through the job. Creality builds that adjustability in, and reviews on Yeti-style shapes are noticeably more positive than the category average.
For straight-sided cans and bottles, the same module works, and the lower end of the range reaches down to 5mm for pens and small tubes.
What to check before you buy
Verify your engraver brand against the listing first. If you are not on a Creality machine, this one is out regardless of how well the support module would fit your part.
Read up on the firmware parameter change before your first job so you know how to restore your original setting. Forgetting the restore step is a common way to confuse a later flat-bed job with a rotary problem.
6. xTool RA3 – Best Rotary for Quick Changes and Mixed Projects
Best for: xTool P3, F2 Ultra, F1 Ultra and F2 owners who switch between tumblers, rings and spheres often enough that a tool-free change pays off.
xTool RA3 World’s First Smart MagSwap Rotary for xTool P3, F2 Ultra, F1 Ultra, F2 Laser Engraver, 360° LiDAR Mapping Alignment, Intelligent Rotary that Masters Engraving on Rings, Tumblers & Ornaments
MagSwap tool-free quick change
130mm chuck and batch modes
12-month manufacturer warranty
Pros
- MagSwap magnetic quick change between chuck roller sphere and ring in seconds
- Auto mode recognition 3D preview and auto-focus via 360 degree LiDAR mapping on the P3
- Enlarged 130mm chuck plus batch processing for volume work
- Flexible chuck configurations make centering and grip straightforward
- One-step inner ring angle adjustment for detailed ring work
Cons
- 360 degree LiDAR mapping works only on the xTool P3
- Software has no center-origin definition so positioning is manual
- Rotary speed caps at 400mm per second
- No mechanical jig insert for repeatable alignment
The RA3 is the most interesting mechanism on this list. Instead of rebuilding a chuck, the MagSwap system uses a strong magnetic attachment to swap between chuck, roller, sphere and ring in seconds, and owners consistently single out that quick change and the chuck grip as the best they have used.
For tumblers, the 130mm chuck is among the largest in this roundup and the batch processing mode in roller and jaw setups is aimed straight at order volume. The flexible jaw configurations make centering a wider range of diameters straightforward.
At 4.5 stars across 65 ratings, with 82 percent five-star ratings, this is well regarded inside the xTool community, and reviewers describe it as a worthwhile upgrade from the RA2. The machine list is specific: the P3, F2 Ultra, F1 Ultra and F2, with a separate variant for the P2 and P2s.
The LiDAR mapping and auto-focus features are the headline and they are P3-only. On other supported machines you get the mechanical benefits of the magnetic fixture without the automated alignment, so set expectations accordingly before you compare it to the RA2 Pro on fit.
Two other limits are worth knowing. Rotary speed tops out at 400mm per second, well below what the machines themselves advertise, and there is no mechanical jig insert for repeatable alignment, so a bumped frame can knock your centering off. Some owners also report grinding noise from the servo box.
Where the automation actually pays off
The 3D preview and auto mode recognition save the most time on jobs you repeat, because the machine sets itself up between a tumbler batch and a ring batch rather than waiting for a manual change. For a one-off tumbler, the benefit is smaller.
Speed matters most on shallow surface marking, where a lower rotary ceiling can mean a longer job. Check your planned pass settings against the 400mm per second limit before committing to a large order.
What to check before you buy
Confirm your exact machine is on the supported list and order the correct variant, because the P2 and P2s use a different one. If you are on the P3, the LiDAR features justify this over a mechanical module; if you are not, compare carefully.
Plan on marking your own center reference, since the software has no center-origin definition. A scribed guide line and a bit of manual math is the current workaround.
7. Creality Rotary Roller Pro – Best Grip Set for Shaped Workpieces
Best for: anyone engraving beyond straight cylinders, especially handled mugs, hex objects and rings, who can supply their own riser.
Creality Rotary Roller Pro, Laser Engraver Accessories 3-in-1 Kit for Falcon and Other Engraving Machines, Jaw Chuck for Glass, Cylindrical Objects, Ring, Cups, Pens
3 gripper shapes included
1-110mm cylinders and 15-100mm rings
Falcon series ready
Pros
- Three gripper sets cover trapezoidal L-shaped and hexagonal objects
- Anti-slip soft pads add friction and protect fragile items
- Works with the Creality Falcon series and about 95 percent of engravers
- No assembly required and works with LaserGRBL or LightBurn
- Covers 1-110mm cylinders 10-130mm balls and 15-100mm rings
Cons
- Risers needed for mounting are not included
- Check port compatibility before using with a non-Creality machine
- Software setup has a learning curve
The defining feature is the gripper set. Three shapes ship in the box, trapezoidal, L-shaped and hexagonal, and together they cover a far wider range of workpieces than a single roller or a single round jaw. For a tumbler, the trapezoidal gripper holds the tapered wall without letting the base swing.
Coverage numbers are generous: cylinders and cans from 1mm to 110mm, shaped cylinders from 25mm to 75mm, balls from 10mm to 130mm, and rings and bracelets from 15mm to 100mm. That makes it one of the most complete all-round kits in this roundup short of a dedicated commercial platform.
Compatibility is unusually open for a first-party accessory, since the Creality Falcon series is supported along with roughly 95 percent of other engravers through a PH2.0 6-pin interface. It arrives factory assembled, so you are not building a frame on day one.
The anti-slip soft pads are a small detail that matters more than they sound like. They raise friction enough to stop a lightweight tumbler slipping mid-wrap, and they protect glass and coated surfaces from the jaw contact that causes marks.
The most common complaint is missing hardware, and it is specific: the risers needed for mounting are not included. You will need a riser of your own, and on a machine where the rotary sits above the bed that is not optional.
Software setup also draws comments, with owners describing a learning curve on first configuration. Budget an afternoon with the manual before a production run.
When three grippers earn their keep
Shaped workpieces are where a single-format rotary shows its limits. A hexagonal tube, a mug with a handle and a tumbler with a tapered base each want a different contact pattern, and shipping three different contact shapes is what separates this kit from a single-format rotary.
For straight tumblers only, you are paying for grippers you may never use. For a mixed order sheet, they are the reason to pick this over a cheaper roller.
What to check before you buy
Source a riser for your machine before the attachment arrives, and confirm the port type on a non-Creality engraver. The PH2.0 6-pin connection is the single point where an otherwise universal product can fail.
Check your vertical clearance too. At 14 by 4.8 by 3.9 inches the footprint is long, so a compact enclosure may not have the room for it without a riser.
8. ACMER M4 – Widest Roller Range in the Roundup
Best for: owners of ACMER machines or other diode engravers who want a plug-and-play roller covering everything from a small ring to a large cylinder.
ACMER M4 Laser Rotary Roller, 360° Y-Axis Rotary Attachment for Laser Engraver, 3–150mm Adjustable Engraving Space, for Cylindrical Objects, Rings, Compatible with Most Laser Engravers
3-150mm adjustable range
Pre-assembled Y-axis plug-in
Aluminum frame with rubber rollers
Pros
- 3-150mm adjustable roller spacing covers small rings through large cylinders
- High-friction rubber rollers and a rigid aluminum frame reduce slipping on heavy workpieces
- Arrives fully pre-assembled and connects to the Y-axis port
- Works with Acmertool LightBurn and LaserGRBL
Cons
- Newer listing with a smaller owner base than the established modules
- Roller grip handles fewer shapes than a jaw chuck kit
The headline number is the range. A 3mm to 150mm adjustment is the widest single-span roller coverage in this roundup, and it means one module covers rings, pens, cans, tumblers and large bottles.
The build is aimed at resisting slippage. High-friction rubber rollers sit in a rigid aluminum frame, and the review pattern is that long or heavy workpieces stay concentric through a full wrap instead of creeping under the laser.
It ships fully assembled and connects directly to the Y-axis port, so there is no frame to build and no wiring to figure out. Software support covers Acmertool, LightBurn and LaserGRBL, and the machine list includes the ACMER S2, P1, P2 and P3 along with most diode engravers.
At 4.2 stars across 46 ratings it sits slightly below the established modules, with 67 percent five-star ratings. That gap mostly reflects a newer listing with a thinner owner history rather than a specific reported fault, and it is the reason this is not higher in the ranking.
Like every roller here, it centers round parts beautifully and does much less for irregular shapes. A mug with a handle will not sit flat, and no amount of roller friction changes that.
Where the 150mm end earns its place
Large-diameter work is where most budget rotaries fall short, because the arms were sized for cans and bottles. Being able to span to 150mm means a wide-mouth insulated tumbler or a large glass vessel fits without a workaround.
At the 3mm end you can hold jewelry-scale parts, though at that diameter a jaw chuck gives you more usable control.
What to check before you buy
Confirm your machine has a Y-axis port and that your control software is one of the three named. This module is aimed at diode engravers, so a CO2 or fiber platform may need a different fixture type entirely.
Check the review count before you commit. There are 46 ratings here, a thinner history than most modules in this roundup, so you are buying on specification more than on proven long-term behavior.
9. OMTech 3-Jaw Chuck Rotary – The Choice for a CO2 Shop
Best for: owners of a 50W or larger OMTech CO2 engraver who want a proper chuck and tailstock for production tumbler, bottle and tube work.
OMTech Rotary Axis Attachment with 3-Jaw Chuck for CO2 Laser Engravers
3-jaw chuck with tailstock
50W and higher CO2 only
Iron and aluminum alloy frame
Pros
- 3-jaw chuck and tailstock give smooth low-noise rotation
- Iron and aluminum alloy construction with a corrosion-proof coating
- 4-wire cable plugs into a dedicated port with simple software configuration
- Works with 50W 60W 80W 100W and 130W OMTech CO2 engravers
Cons
- Limited to 50W and higher CO2 platforms rather than diode engravers
- Heaviest unit in this roundup at 9 kg
If your machine is a CO2 engraver rather than a diode, almost nothing else in this roundup will work, and this is the pick. The 3-jaw chuck and tailstock combination is the classic production arrangement: the jaws clamp the workpiece and the tailstock supports the far end so a long bottle or tube stays straight through a full wrap.
At 4.4 stars across 42 ratings with zero one-star reviews, the consistency of the ratings is itself informative. Buyers describe smooth, quiet chuck operation and a build that feels appropriate for shop use rather than hobbyist use.
Connection is straightforward. A 4-wire attachment cable plugs into a dedicated port on the machine, and software configuration is described as simple relative to the Y-axis modules here. The frame is iron and aluminum alloy with a corrosion-proof coating, which matters in a shop with extraction running and metal dust in the air.
Compatibility covers the 50W, 60W, 80W, 100W and 130W OMTech CO2 platforms. That range of supported wattages is the practical advantage, since the same attachment covers most of the range of machines a small shop might own or grow into.
The two limitations are size and weight. At 9 kg it is by far the heaviest unit here, which matters if you are moving it between machines, and it is restricted to 50W-and-above CO2 platforms, so it is not an option for a diode machine at all.
What this attachment does that a roller cannot
A tailstock removes the sag problem. A long bottle clamped at one end will droop under its own weight over a long job, and the droop changes the effective radius as it turns, which shows up as inconsistent depth. Supporting the far end removes the variable.
That is why this configuration scales better than a roller when a shop moves from tumblers to bottles, tubes and pipes in volume.
What to check before you buy
Confirm you have a 50W or larger CO2 platform. If your machine is a diode, a fiber or anything smaller than 50W CO2, this attachment is not a candidate no matter how good the chuck looks.
Check the footprint against your bed. At 22.8 by 5.9 by 7.1 inches it is a long unit, and the tailstock end needs clearance behind the chuck for a long workpiece.
10. Woxcker ARot8 – Feature-Rich Kit With a Narrow Compatibility Window
Best for: Woxcker L8, L2 and JL7 owners who want a four-piece grip set and the widest ball coverage of any attachment in this roundup.
Woxcker ARot8 Rotary Roller, 4 in 1 Multi-Function Chuck Rotary Roller, Adjustable Jaw Chuck Rotary for Engraving Cylindrical Objects, Tumbler, Baseball Bat, Only Compatible with Woxcker Engraver
4-in-1 roller and three clamps
Balls to 200mm
0.225 degree angle control
Pros
- Four-in-one kit with a roller base plus trapezoidal L-shaped and hexagonal clamps
- Millimeter-level chuck precision with 0.225 degree angle control
- High-torque motor supports speeds up to 10000mm per minute
- Anodized aluminum frame with a brass chuck and non-slip support pads
- Pre-assembled with clip-on installation and one-hand sliding adjustment
Cons
- Only compatible with Woxcker L8 L2 and JL7 engravers
- Lowest average rating in this roundup at 4.1 with a 9 percent one-star share
- Software setup requires GRBL or LightBurn configuration
The specification sheet on the ARot8 is the most impressive in this roundup on paper. The chuck holds millimeter-level precision with 0.225 degree angle control, and the high-torque motor is rated to 10000mm per minute synchronized with the machine, which is a considerable step up from the roller modules above it.
Coverage is broad too: cylinders from 1mm to 130mm, balls from 4mm to 200mm, rings from 4mm to 130mm, plus handled mugs and tumblers as a listed special shape. The 4-in-1 kit gives you a roller base and three interchangeable clamps in one package.
Construction is an anodized aluminum alloy frame with a high-hardness brass chuck and adjustable non-slip support pads. It arrives pre-assembled with external clip-on installation and one-hand sliding adjustment, so setup is minimal.
It finishes last for one overriding reason: compatibility. This attachment is restricted to a single machine brand, specifically the Woxcker L8, L2 and JL7, and that removes it from consideration for almost everyone who reaches this page.
The 4.1 average rating is the lowest here, with a 9 percent one-star share against 64 percent five-star ratings. Reviews describe a feature-rich kit whose ratings trail the category leaders, and software configuration through GRBL or LightBurn is a required extra step on Windows, macOS and Linux.
What the extra precision buys you
Finer angle control matters most on small, dense artwork where each step advances the workpiece only a fraction of a degree. On a simple monogram the difference is invisible; on a dense full-wrap pattern it shows.
The 200mm ball coverage is the highest here, and for a maker doing sports memorabilia that single specification may justify the brand lock on its own.
What to check before you buy
Check your machine brand first and only proceed if you own a Woxcker L8, L2 or JL7. There is no listed adapter path to another brand, so this is a hard stop rather than a caution.
Read the GRBL or LightBurn configuration notes before your first job, and set aside time for jaw and clamp adjustment. The precision is real, but only once the setup is dialed in.
Which Type of Rotary Attachment Do You Need?
Roller modules for speed and batch loading, a jaw chuck for precision and irregular shapes, a Y-axis rotary for dedicated machines where the bed is meant to be given up to rotation, and a ring fixture only for jewelry. Most people only need one of the first two.
Roller rotary
A roller grips by friction between two or more rubber-coated surfaces, and the workpiece simply spins between them. It is fast to load, cheap, and self-centering on a straight cylinder, which is why most budget modules use this design. It struggles with tapers, handles and anything that is not rotationally symmetric.
Jaw chuck rotary
A chuck clamps a workpiece at defined points on each jaw, so it does not slide as the part turns. That gives better repeatability and lets you handle irregular or polygonal parts, at the cost of setup time and a higher price. If a third of your orders are not straight-sided cylinders, this is the correct answer.
Multi-mode rotary
Frames such as the xTool RA2 Pro and the ORTUR YRC1.0 combine a roller, a chuck, a sphere module and a ring fixture in one body. They cost more and take longer to learn, but they remove the need to buy a second fixture when your product range grows.
Y-axis override and why it matters
Almost every rotary on this list works the same mechanical way: it takes the place of the machine’s Y-axis motor. Once mounted, you cannot use the bed for a flat job, and you have to enter the workpiece diameter and a rotation ratio in LightBurn or EZCad so the software knows how far the surface has traveled. Get the ratio wrong and the design stretches, smears or bands around the curve. If you want a broader look at leveling and layout tools for the same kind of precision work, our guide to rotary laser levels for grading covers that side of the job.
This is the single most important thing to understand before buying, because it is a genuine trade rather than a free upgrade.
How to Set Up and Calibrate a Rotary Attachment
Nearly every disappointing first wrap traces back to skipping one of these steps. The process takes about twenty minutes the first time and five minutes thereafter.
Mount the rotary and confirm axis alignment. Seat the frame flat, make sure the rotation axis sits at the height of the laser focus, and check the rollers or jaws run true. A frame that is off by even a fraction of a degree will drift through a long wrap.
Set the correct diameter. Measure the actual workpiece, not the nominal size, and set the roller spacing or jaw positions to match. This is the most common cause of a design that looks stretched or compressed at the seam.
Enable rotary mode in your software. In LightBurn or EZCad, switch the job to rotary mode and enter the diameter. Do this before sending anything to the machine.
Calibrate the rotation ratio. Run a test pattern, measure the mark, and adjust the ratio until a circle is a circle and a line is a line. An error here shows up as a design that is too wide or too narrow around the circumference.
Dry run, then test cut on scrap. Run the job with no material to check the axis and the start and stop point, then do a small test on a spare tumbler. Only then commit a blank.
One more thing worth doing is checking depth consistency around the circumference. If your mark is darker at the sides than at the front and back, the rotation is uneven, and a shallow dial-in test will show it long before a full wrap does.
Why Is Your Rotary Engrave Blurry or Seamed?
Blur on a curved surface is almost always one of five things, and they are worth checking in this order because the causes compound.
Rotation ratio miscalibration. If the software is advancing the workpiece faster or slower than the real motor turns, the design smears along the direction of travel. Recalibrate the ratio before changing anything else.
Focus height on a curved surface. Even a good rotary holds the radius, but a tumbler with a slight taper or a wall that is not perfectly round will move in and out of the focal plane. Check focus on the sides of the part, not just the front.
Surface oils on a new blank. Handling oils and coating residue on a fresh tumbler scatter the beam. Wipe the surface before the first pass, and wear gloves for bare stainless.
Diameter mismatch in the fixture. A part set slightly loose will creep during a long job. Re-check the diameter setting and the clamping pressure before blaming the laser.
Source power and pass settings. If everything above is right and the mark is still soft, lower the power or increase the number of passes rather than the speed.
There is a live case worth knowing about. One user running an H2D with a 10W laser reported that the original Bambu Lab tumbler came out completely blurry even using the manufacturer preset settings, and could not identify the cause. That symptom pattern is consistent with steps one and two above, and it is the reason the rotation ratio and the focus check come first in this list.
On the seam specifically: a visible join is usually a start and stop alignment problem rather than a rotation problem. A jig or stand insert that fixes the part in the same position each time is worth more than any software setting, and not every attachment includes one.
One more gotcha that catches first-time owners. Users of the xTool M2 point out explicitly that the 3D-printed holders for accessories are not included, so the fixture you need to keep a tumbler in a repeatable position may be a separate print. Check what is in the box before you assume you have everything.
How to Choose a Laser Engraver Rotary Attachment
Seven things decide whether a rotary will work for you, and compatibility is the first of them, not the price.
1. Machine and software compatibility
This is the hard filter. Confirm the Y-axis port type on your machine, confirm your control software is one the rotary supports, and check whether the listing names your brand or claims broad support. A module that needs a wire swap will work; a module restricted to one machine brand will not.
2. Axis type and how it connects
Almost everything here is a Y-axis module that replaces the Y motor, so you lose the bed while it is mounted. A few commercial platforms take a different approach. Either way, know the trade before you buy, because it changes how you plan your work.
3. Diameter range and jaw configuration
Check the minimum and maximum diameter against your real work. Anything from 3mm to 130mm covers pens, cans, tumblers and bottles in one unit, and a stepped adjustment is fine as long as a step exists for each size you run. A 3-jaw chuck holds better than a roller on anything tapered or handled.
4. Motor and stepper quality
This is where rotation speed and minimum step angle live, and both show up directly in output quality. A higher minimum angle resolution keeps small text from dragging near the seam, and a higher maximum rotation speed shortens long full wraps. Reviewers also consistently flag vibration and slip as the practical failure mode.
5. What is actually in the box
Jigs, holders, risers, chuck keys and mounting brackets are inconsistently included in this category. Several attachments in this roundup do not include the riser they need, and at least one brand’s accessory holders are sold separately. This is the most common surprise after delivery.
6. Laser type and enclosure
A rotary does not change what your laser can do to a surface, it only changes how that surface is presented. A diode machine handles powder-coated tumblers cleanly because the coating absorbs the light, while bare stainless and anodized aluminum need a fiber or MOPA source. A rotary also lowers the working distance in some setups, so check bed clearance before a tall bottle hits the frame.
7. Tumbler material and diameter matching
Powder-coated stainless drinkware of the YETI and Stanley class takes surface marking well and is the easiest place to start. Bare stainless needs a fiber or MOPA. Glass and ceramic work with a diode on the coating with the right settings, and wood and bamboo need very little power. Either way, measure the widest part of the tumbler, because a lid or a handle can be wider than the body.
Whichever route you take, confirm the current configuration and specifications on the manufacturer page before you commit, since bundles and included accessories change.
Frequently Asked Questions
Do I need a rotary attachment to engrave a tumbler?
Yes, for any full 360 degree wrap. A tumbler is curved, so the distance between the beam and the surface changes constantly as the laser crosses it, which produces uneven depth, soft line edges and a drifting design. Turning a tumbler by hand makes it worse. A rotary holds the radius constant and feeds the software a rotation ratio so the design lands where you placed it. Without one you can still mark a small logo on a flat panel, but not a wrap.
What type of laser is best for tumblers?
It depends on the surface, not the tumbler. Powder-coated stainless absorbs light at the coating layer, so a diode laser marks it cleanly and cheaply. Bare stainless steel and anodized aluminum need a fiber or MOPA source because the metal itself will not take a mark from a diode. In every case a rotary attachment is required. If you only ever engrave coated drinkware, a diode machine plus a roller is the economical setup.
What is the best tumbler for laser engraving?
A powder-coated stainless tumbler with a matte or textured finish is the easiest to mark well. The coating absorbs the light, the texture hides the mark more gracefully than a high-gloss coat, and the straight wall centers cleanly in a roller. A gloss-coated tumbler shows every pass line, and a tapered or handled body centers badly regardless of laser type. Bare stainless needs a fiber or MOPA laser before it will mark at all.
Which laser engraver is best for tumblers?
For coated drinkware, any quality diode laser paired with a rotary attachment produces good results, and xTool machines are the most frequently recommended in user discussions. For bare stainless or anodized aluminum, you need a fiber or MOPA laser with a rotary rated to the tumbler diameter. Since this roundup covers the attachment rather than the machine, the deciding question is which rotary matches the engraver you already own.
How do I use a laser engraver on a tumbler?
Mount the rotary so the rotation axis sits at the laser focus height, then set the roller spacing or jaw positions to the measured diameter. In LightBurn or EZCad, switch the job to rotary mode, enter the diameter, and calibrate the rotation ratio with a test pattern. Run the job dry with no material to check the start and stop point, then do a small test cut on a spare tumbler before committing a blank.
Why is my rotary tumbler engraving blurry?
Check the rotation ratio first, because a miscalibrated ratio smears the design along the direction of travel. Next, check focus height on the sides of the tumbler, since a curved or slightly out-of-round wall moves in and out of the focal plane. Then wipe surface oils off a new blank, confirm the diameter setting matches the actual part, and only then reduce power or add passes.
How much should I charge to laser engrave a tumbler?
Price the job on machine time plus consumables rather than on the blank alone. A full wrap on a coated tumbler takes roughly half an hour of machine time including setup and calibration, and your real costs are the machine hour, the tumbler, consumables and finishing. Many small businesses add a rotary specifically so they can take YETI and Stanley orders, and they quote a base engraving charge plus a per-item setup fee.
Conclusion
The best laser engraver rotary attachments for tumblers are the ones that match your machine and your material, not the ones with the longest specification list. Pick compatibility first, diameter range second, and grip type third, because the rest is refinement.
Choose the Ortur Laser Rotary Roller if you want the most proven option and a 7-step range from 8mm to 110mm on a diode machine. Choose the xTool RA2 Pro if you want the most capability in one frame and you own a supported xTool. Choose the Longer Rotary Roller Series if you want the widest height range and broad wiring coverage. Choose the ORTUR YRC1.0 when your work includes rings, balls or anything tapered, and the OMTech 3-Jaw Chuck if you run a 50W or larger CO2 platform.
Whichever you choose, set aside twenty minutes to calibrate the rotation ratio and run a test cut before you touch a real blank. That step is where most disappointing first wraps are won or lost, and it costs nothing but a scrap tumbler.