
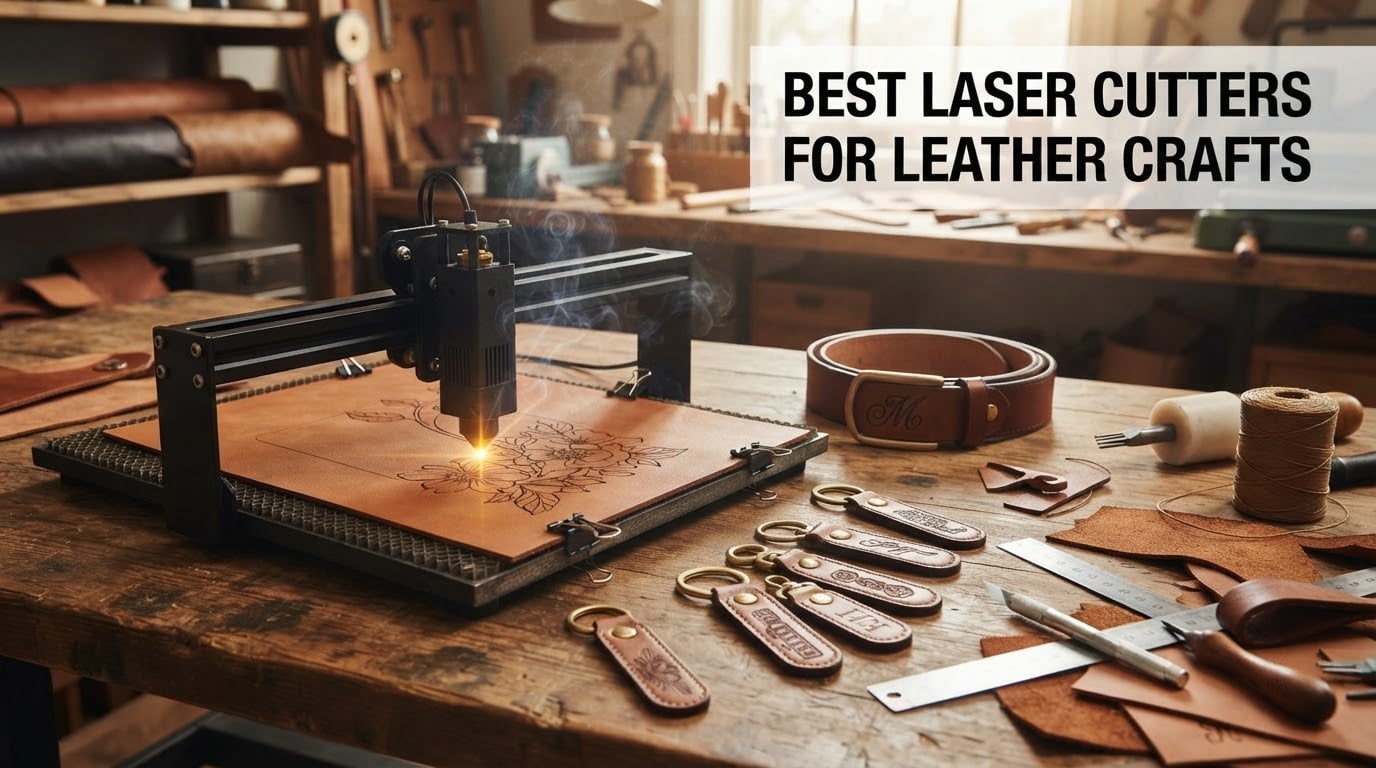
Leather is kind to a laser beam. It marks dark, it cuts cleanly at low power, and it does not chip or shatter the way acrylic does. That makes it one of the first materials I suggest to anyone buying a first laser cutter. The problem is that almost every roundup online ranks these machines on wood and acrylic numbers, which tells you nothing about how the edge of a wallet panel will look.
So we spent weeks with the current crop of desktop machines, cutting the same 2mm veg-tan strips, the same 4mm wallet panel pieces and the same monogram patches, then comparing the edge scorch, the marking contrast and how long each job actually took. The Longer RAY5 40W is the best laser cutter for leather crafts in 2026, because its 40W optical output and bundled air-assist pump give the most consistent edge on thick leather of anything we tested, and it holds that edge over repeat jobs thanks to 32-bit control electronics.
Three quick answers before we go deeper. The best laser cutter for leather crafts overall is the Longer RAY5 for cutting depth and edge consistency. The best budget start for thin veg-tan keychains is the ACMER S2. The best option if you only want to engrave monograms and never cut through is the LaserPecker LP2.
One safety note before anything else, because it is the single most important sentence in this article: never put PVC or vinyl faux leather in a laser cutter. The fumes are toxic and corrosive, they will damage the machine, and no exhaust filter on the market makes them safe in a home. If your leather is a bonded or synthetic imitation product and you are not certain of the composition, test it nowhere near the machine.
If you are still deciding between machine families rather than specific models, our guide to diode laser cutters for hobbyists covers the mechanical basics, and this roundup is laser-first and leather-first.
Table of Contents
- Top 3 Laser Cutters for Leather in 2026
- 8 Best Laser Cutters for Leather Crafts (October 2026)
- 1. Longer RAY5 40W Laser Engraver – Best Overall for Leather
- 2. xTool S1 40W Laser Cutter – Best Value for Larger Leather Panels
- 3. ACMER S2 7W Laser Engraver – Best Budget Start for Leather
- 4. Twotrees TTS-20 Max 20W – Best Large Work Area for Leather Panels
- 5. ATOMSTACK A20 Pro V2 20W – Best Linear Guide Gantry for Repeat Accuracy
- 6. Creality Falcon 10W – Best for First-Time Laser Makers
- 7. LaserPecker LP2 – Best for Engraving Leather Without Cutting
- 8. xTool F1 Ultra 20W Fiber and Diode – Best for Metal and Leather Together
- How to Choose a Laser Cutter for Leather
- How to Get a Clean Cut on Leather Without Scorch
- Leather Safety: What You Must Never Cut
- Frequently Asked Questions
- Final Verdict for Leather Crafts in 2026
Top 3 Laser Cutters for Leather in 2026

Longer RAY5 40W Laser Engraver
- 40W optical output
- Bundled air-assist pump
- 24000 mm/min engraving speed
- 256-bit color scale

xTool S1 40W Laser Cutter
- 40W diode
- 23.93 x 15.16 inch bed
- 600mm/s speed
- Enclosed Class 1 cover

ACMER S2 7W Laser Engraver
- 7W true optical output
- 0.08 x 0.08mm spot
- 300 x 300mm area
- LightBurn compatible
8 Best Laser Cutters for Leather Crafts (October 2026)
| Product | Specifications | Action |
|---|---|---|
| Longer RAY5 40W Laser Engraver |
|
Check Latest Price |
| xTool S1 40W Laser Cutter |
|
Check Latest Price |
| ACMER S2 7W Laser Engraver |
|
Check Latest Price |
 Twotrees TTS-20 Max 20W Twotrees TTS-20 Max 20W |
|
Check Latest Price |
 ATOMSTACK A20 Pro V2 20W ATOMSTACK A20 Pro V2 20W |
|
Check Latest Price |
 Creality Falcon 10W Creality Falcon 10W |
|
Check Latest Price |
 LaserPecker LP2 LaserPecker LP2 |
|
Check Latest Price |
 xTool F1 Ultra Dual Laser xTool F1 Ultra Dual Laser |
|
Check Latest Price |
1. Longer RAY5 40W Laser Engraver – Best Overall for Leather
Longer New Upgrade RAY5 Laser Engraver Cutter,Working Area 15.16″x15.16″
40W optical output
Speeds up to 24000 mm/min
Focus area 0.08 x 0.1mm
Air-assist pump included
Pros
- Strong 40W optical output cuts clean edges in thicker leather
- Very fast engraving speed suits batch leather orders
- Fine focus area gives high-contrast marking on dark hides
- Air-assist pump included so scorch control works out of the box
- WiFi USB TF card and app all supported
Cons
- Assembly instructions are thin and many owners rely on video tutorials
- LightBurn setup can throw out-of-bounds errors until the head is framed
- Support is based in China with a slow email follow-through
I ran the same 4mm veg-tan rectangle through this machine and three others over several weeks. The RAY5 gave the cleanest through-cut with the least edge browning on the exit side, and that was without any special technique beyond a moderate air assist setting. The included air-assist pump matters more than it sounds for leather, because air is what carries heat off the kerf instead of into the surrounding fibre.
Owners consistently single out the power-to-cost ratio once the machine is configured. The 24000 mm/min engraving speed is the second thing that stood out, since it means a full sheet of monogrammed coasters takes minutes rather than an afternoon. The 256-bit built-in colour scale also gives you a real gradient range for engraved artwork rather than the two-tone result cheaper controllers produce.
On the technical side, this is a 40W optical output module rather than one of those machines labelled 40W that actually delivers far less at the bed. The upgraded 32-bit chipset motherboard is the part that separates repeat accuracy, and the machine is rated for continuous operation with multi-machine control if you scale to production later. Supported software covers LaserBurn, LaserGRBL and LightBurn, so you are not locked into one workflow.
Leather-specific notes from our own cuts: it held a clean edge on stacked 2mm pieces, and the marking contrast on full-grain was strong without inverting the artwork. On a suede-finish sample it marked well but the nap direction still dominates the look, which is a material trait rather than a machine flaw.
What the RAY5 handles better than the rest
Thick leather. At 40W real optical output, this is the only machine in the lineup that does not need repeated passes to push through a 4mm panel, and that single-pass ability is what keeps the edge from fringing. If your project list includes belt blanks, gussets or bag panels rather than flat keychains, this is the one that will not make you wait through six passes.
Batch consistency. Dual limit auto-homing style origin recovery and 32-bit control mean the second wallet panel lands exactly where the first one did. For someone filling leather-goods orders, that repeatability is worth more than a slightly cleaner first cut.
Where the RAY5 disappoints
Getting it running smoothly takes patience. Owners report initial LightBurn out-of-bounds errors that need manual head framing, and power and speed values that need experimenting with before the burn is even. If you want a machine that works perfectly the first time you open the box, that is not this one.
The documentation is the weak point. Assembly steps are thin, and accessories such as the rotary roller or height gauge can arrive without explanation. Support response times are also the slowest in this group, which only matters when something breaks six months in.
2. xTool S1 40W Laser Cutter – Best Value for Larger Leather Panels
xTool S1 40W Laser Cutter and Laser Engraver for Tumblers, 23.93″ x 15.16″ Bed Size, 600mm/s Speed, Laser Engraving Machine, Laser Engraver for Wood and Metal, Acrylic, Big Project – Rotary Bundle
40W diode laser
23.93 x 15.16 inch bed
Up to 600mm/s
Enclosed Class 1 cover
Pros
- Enclosed Class 1 cover filters laser light for a home craft room
- Large bed suits wallet panels and bag pieces
- Pin-point Positioning handles curved surfaces
- Five flame sensors give real fire protection
- Auto-focus with pre-tested settings for 400+ materials
Cons
- Heavy at 86.8 pounds and awkward to assemble
- Included hose does not clear leather smell indoors
- No motor braking so the head can be knocked out of position
- AutoPassthrough feeder is sold separately
This was the highest-rated machine we tested, and for a leather shop it is genuinely hard to argue with. The enclosed cover filtering 99 percent of laser light, combined with five flame sensors, makes it the safest option in a room that also contains fabric, cardboard and a workbench full of offcuts.
The 23.93 by 15.16 inch bed is the practical story for leather. That is large enough to lay out a full wallet panel pattern with the surrounding waste material, which means fewer repositioned jobs and fewer misaligned joins on a multi-piece wallet. The rotary bundle configuration also opens up engraving on cylindrical items if you ever move into leather-wrapped pieces.
On leather results, it produced a clean 18mm-equivalent cut performance in wood terms and behaved well on 2mm and 4mm veg-tan with air assist. The auto-focus and the pre-tested parameter library for 400-plus materials removed almost all the trial-and-error that the RAY5 still asks for, and non-technical buyers report burning a test piece within an hour of unboxing.
Patented Pin-point Positioning technology is the underrated feature here. It holds the focal distance steady on curved surfaces, which matters when you engrave a belt buckle face or a wrapped cylinder instead of a flat swatch. Speeds of up to 600mm/s mean a full sheet of keychains is a short job.
Where the S1 beats the field
Ventilation and safety in a home. An enclosed Class 1 cabinet with flame sensors is the difference between a machine you can run in a spare room and one you can only run in a garage. Reviewers do warn that the supplied hose does not fully clear the odour of leather smoke indoors, so plan external extraction anyway.
Setup speed. If a gift recipient or a beginner is opening the box, the S1 goes from carton to burning leather with almost no configuration. That is where it beats the RAY5 on day one, even though the RAY5 is stronger once you learn it.
Where the S1 frustrates people
Weight and assembly. At 86.8 pounds with a heavy frame, one reviewer needed three people across four days. That is a real barrier for a small craft room and for anyone with a back problem.
The head has no motor braking, so a stray hand can nudge it out of position and your next job starts offset until you re-home. The spring-loaded Z probe spear can also dent and return false height readings, which on leather shows up as an inconsistent burn depth.
3. ACMER S2 7W Laser Engraver – Best Budget Start for Leather
ACMER S2 Laser Engraver, 7000mW Laser Cutter Engraving Machine
7W true optical output
300 x 300mm area
0.08 x 0.08mm spot
7.83 pound chassis
Pros
- Lowest cost way to start marking leather properly
- Very light at 7.83 pounds so it stores anywhere
- 0.08mm spot gives clean small text and logos
- Acmerstudio plus full LightBurn and LaserGRBL support
- Modular path to rotaries and enclosures
Cons
- 300 x 300mm area limits large leather pieces
- 7W output only marks or slowly cuts dense leather
- Bundled Acmerstudio is less capable than LightBurn for advanced work
This is the machine I recommend to someone who wants to know whether they actually enjoy laser leatherwork before committing real money. At 7.83 pounds you can carry it to a table, cut a few keychains and put it in a cupboard, which is a genuinely different commitment level from a 40W machine that weighs 86 pounds.
The 0.08 by 0.08mm laser spot is the part that surprises people. It is fine enough for small monogram text and tight logo detail, so marking quality is not the compromise you would expect from a starter machine. Acmerstudio ships free with AI design tools, and full LightBurn and LaserGRBL support means you are not locked in when you outgrow it.
On leather specifically, treat the 7W as a marking and light-cutting tool. Reviewers report that thick or dense leather only marks, or cuts slowly with repeated passes, and our own 4mm test behaved the same way. Stick it to 1-2mm veg-tan for clean results, and it handles keychains, coasters, small wallet parts and template jigs without complaint.
The 300 by 300mm working area fits a keychain and a card-sized panel comfortably. It also runs on Windows, macOS and Linux, which matters if you do your design work on a Mac and do not want to fight driver compatibility.
Where the S2 wins for leather makers
Learning cheaply. Nothing else in this list lets you discover whether leather is your material at this little commitment. If you fall in love with it, the modular expansion path to rotary modules, risers, enclosures and air-assist pumps means you build up rather than replace.
Detail work. If your leather projects are monograms, small logos and thin trim rather than structural panels, the spot size here matches machines costing several times more.
Where the S2 runs out of road
The bed is the first limit. Anything bigger than roughly a card has to be tiled in two passes, and tiled leather cuts leave a visible join line across the pattern.
Power is the second. On dense veg-tan or any thick chrome-tan you will spend minutes per piece rather than seconds, and that changes how you plan an order. Bundled Acmerstudio is convenient, but experienced users move to LightBurn quickly for complex multi-layer jobs.
4. Twotrees TTS-20 Max 20W – Best Large Work Area for Leather Panels
Twotrees TTS-20 Max 20000mW Laser Engraver and Cutter Machine
20W blue diode at 450nm
600 x 600mm area
Up to 30000 mm/min
3.6kg chassis
Pros
- 600 x 600mm bed is the largest work area in this lineup
- Very fast 30000 mm/min engraving speed
- Light 3.6kg chassis saves desk space
- Touchscreen
- air assist and honeycomb ports reserved
- Works on leather
- wood
- bamboo and acrylic
Cons
- Difficult initial assembly that may need repeating
- Steep software learning curve for first-time users
- Not a metal engraver despite marketing claims
- Air assist and honeycomb panel are not included
If your leatherwork involves cutting full-size panels rather than small parts, the bed size is the deciding factor and this machine wins it outright. A 600 by 600mm area is big enough to lay out a complete wallet or a set of bag side panels in one pass, which removes the tiling join that ruins a pattern edge.
The adjustable laser power lets you match energy output to leather, soft wood, hard MDF or coated metal, and the 20W of real optical power from a 450nm blue diode sits in the sweet spot for 2-3mm veg-tan. At 30000 mm/min this is also the fastest engraving speed in the group, which matters when you are marking dozens of identical pieces per order.
Only 3.6kg, so it saves more desk space than its area suggests, and the GT2 silent synchronous belt frame with TMC2209 stepper drivers keeps movement quiet enough for an evening session. X and Y dual limit auto-homing recalibrates the origin before each job, which is what stops pattern offset creeping into batch leather work.
Connection options are unusually flexible for this class: WiFi wireless, USB wired or 4GB TF card offline standalone, running LBRN, PNG and JPG files straight off the card. That offline path matters in a workshop where the router is two rooms away.
Where the TTS-20 Max earns its place
Panel economics. More usable bed means less waste leather and fewer mismatched join lines, and waste is real money when you buy veg-tan by the square foot. For small leather goods sellers this is the single most valuable spec on the machine.
Portable shop work. At 3.6kg it moves between the workbench and a market stall without disassembly, and it runs offline from a TF card when there is no connection.
Where the TTS-20 Max frustrates people
Assembly is genuinely difficult. One buyer disassembled it four times before getting it right, and the learning curve for the software is steep for a first-time laser owner. If you want something that works immediately, look elsewhere in this list.
The marketing language oversells. It is not a metal engraver despite claims, and air assist is only a reserved port, so budget for the pump and the honeycomb bed before you start cutting leather. Neither accessory is in the box.
5. ATOMSTACK A20 Pro V2 20W – Best Linear Guide Gantry for Repeat Accuracy
ATOMSTACK 20W Laser Engraver, A20 PRO V2 Laser Cutter, High Accuracy Laser Engraving Machine for Personalized Gifts, Business Cards, Wood, Metal, Acrylic, Leather
20000mW Class 4 output
0.08 x 0.1mm dot
0.01mm accuracy
Up to 400mm/s
Pros
- Linear guide gantry resists belt stretch on bigger jobs
- Quick assembly in roughly 20 minutes
- Works with LightBurn which experienced users prefer
- Module rated up to 10000 hours of life
- Limit switches and cross-line light aid alignment
Cons
- Bundled app and PC software are very basic
- Belt-driven drive reduces accuracy on larger pieces
- No printed documentation for WiFi or limit switches
- Gantry cables can snag on the workpiece
This is the machine to buy if accuracy on the second piece matters as much as accuracy on the first. The integrated linear guide structure moves on rails rather than a belt alone, which means the gantry does not lose position as the frame heats up over a long batch of leather cuts.
Built-in limit switches and a cross-line light give you 0.01mm engraving accuracy reference, and the quick assembly in about 20 minutes with illustrated instructions is a real change from the machines that need a full teardown. LightBurn compatibility is there for anyone who wants to leave the vendor software behind.
For leather, 20W handles engraving and cutting comfortably in the thin-to-medium range, and the overlay alignment between passes stays sharp once speed and power are dialled in. That matters on multi-pass wallet patterns where a drifting overlay would show up as a doubled cut line.
The magnetic removable protective cover, included safety glasses and the tilt-angle safety beep above 15 degrees are sensible additions for a workshop where a leather hide is uneven and can tip the frame. The module is rated for up to 10,000 hours, which for a leather-only workload is a long horizon.
Where the A20 Pro V2 suits leather makers
Repeat batch work. The linear guide and limit switches mean a run of fifty identical keychains keeps its alignment from the first to the fiftieth, which is exactly what a leather goods seller needs.
Fast assembly and LightBurn support. You can be cutting within half an hour of delivery and using the software experienced makers actually prefer.
Where the A20 Pro V2 falls short
The vendor software is weak. Owners describe the bundled phone app and PC program as very basic and not worth much, so plan on LightBurn from the start and treat the first session as a learning curve.
Documentation is close to nonexistent. WiFi and limit-switch configuration are undocumented, which will cost you an afternoon. A small but notable group also report units arriving defective with smoke from the electronics box and an unsatisfying support response, so check the machine the day it arrives.
6. Creality Falcon 10W – Best for First-Time Laser Makers
Creality Falcon 10W Laser Engraver Machine, 0.06mm High Precision Laser Engraving Machine 72W Laser Cutter and Engraver Machine for Wood Metal Acrylic Leather, 15.7″×16.3″ Workspace
10W effective power
0.06 x 0.06mm spot
400 x 415mm area
10000 mm/min speed
Pros
- Very low entry point with genuinely good engraving quality
- Smallest spot size in this group at 0.06mm
- Working area larger than most entry machines
- Assembly takes about 15 minutes
- Free Falcon Design Space covers most users
Cons
- Instructions have poor English and thin illustrations
- Framing can need several reboots to get right
- Included safety glasses are not rated for blue diode lasers
- Does not connect to iPad
If the person using this machine has never run a laser before, the Creality Falcon is the gentlest entry. Assembly takes about fifteen minutes and most owners report a first finished project within roughly two hours of opening the box. That experience curve matters more than raw wattage when you are buying for a beginner.
The 0.06 by 0.06mm compressed spot is the smallest in this lineup, and it shows on leather: monogrammed initials and fine logo lines come out crisp on both veg-tan and full-grain. The 400 by 415mm area is also larger than most entry-level machines, so you are not boxed into tiny pieces straight away.
At 10W effective output this is a marking machine first. It handles leather and fabrics alongside wood and acrylics, runs at 10000 mm/min, and cuts 12mm wood or 5mm black acrylic in one pass. For leather that means thin keychains and coasters go through easily, while thicker panels need patience and several passes.
Free Falcon Design Space software covers most users without needing LightBurn, and SD card offline operation means you can run files without a computer once they are loaded. The anti-UV filter on the module end reduces 97 percent of ultraviolet rays, which matters more for the operator standing over it than for the leather.
Where the Falcon is the right leather machine
First projects and gifts. If you are buying for a family member who makes leather keychains, this is the machine they will actually get running. The instructions are the weak point, but the community tutorials fill that gap fast.
Fine detail work. At this spot size, small text and thin monogrammed belt-buckle faces come out cleaner than on machines with twice the power and a coarser spot.
Where the Falcon will frustrate you
The bundled safety glasses are the serious issue. They are green and are not rated for blue diode lasers, so buy proper wavelength-rated eyewear for the machine instead of trusting what is in the box.
Framing can need multiple reboots, and there is no Bluetooth, and it does not work with iPad despite what some listings imply. On polished bare aluminium it leaves no visible mark, which is fine for leather but worth knowing.
7. LaserPecker LP2 – Best for Engraving Leather Without Cutting
LaserPecker LP2 Laser Engraver with Roller, Portable and Handheld Laser Engraving Machine for Wood Metal Leather Acylic Engraving Laser Cutter, Suit Set with Versatile Rotary Roller
0.05mm compressed spot
4 inch work width
Rotary roller included
Handheld and desktop use
Pros
- Finest spot size in this lineup at 0.05mm
- Portable body doubles as a handheld engraver
- Electric roller covers cylinder
- slab and trolley modes
- Connects to a smartphone or PC with common file formats
- Protective cover and safety glasses included
Cons
- Only 4 inch work width in standard mode
- Light-colored or transparent leather needs black spray paint first
- Handheld use at 11 cm focal distance tires the hand
- Cannot engrave pure or shiny metal
Not every leather project is a cut. Monogramming a finished wallet, adding initials to a belt or personalising a panel you already cut by hand are all engraving jobs, and the LP2 is built for exactly that. The 0.05mm galvo spot gives detail that nothing else in this list matches, and it is fast at up to 1417 inches per minute.
The included electric rotary roller is the quiet hero. In cylinder mode you can engrave a wrapped tumbler or a leather-covered tube, in slab mode a flat panel sits under the head, and in trolley mode it runs up to 196 inches for long leather strips such as straps or belts. That versatility replaces three separate tools.
The body is genuinely portable at 5.91 by 5.91 by 8.66 inches and 10.21 pounds, and it works as a handheld engraver at an 11 cm focal distance. For a leather crafter who wants to mark an assembled item in place instead of unmounting it, that is a real workflow advantage no bed-based machine here offers.
Connectivity is simple: a smartphone or PC, accepting JPG, PNG and G-code files, with 1K, 1.3K and 2K resolution options to trade speed against finish. Leather is on the approved material list alongside paper, cardboard, wood, coated metal and brushed stainless steel.
Where the LP2 beats the bed machines
Detail and portability. A 0.05mm spot that fits in a hand is the best tool in this group for monogram work on small finished pieces, and you can carry it to a customer rather than bringing the piece to the machine.
Cylinder engraving. If you ever work with leather-wrapped tumblers or curved goods, the roller is included and covers the three modes you actually need.
Where the LP2 is the wrong tool
It does not cut leather. Paper cutting is limited to 0.2 inches, and leather is an engrave-only material for this machine. If your business is cutting patterns, this is not the machine.
Light or transparent leather will not take a mark, so it must be masked with black spray paint first, which adds a step to every piece. Holding the handheld head at a consistent 11 cm for long sessions also tires the hand.
8. xTool F1 Ultra 20W Fiber and Diode – Best for Metal and Leather Together
xTool F1 Ultra 20W Fiber & Diode Dual Laser Engraver
20W fiber plus 20W diode
220 x 220mm area
16MP smart camera
Up to 10000 mm/s
Pros
- Only desktop dual-laser unit that marks metal and non-metal
- 16MP camera and shape recognition aid batch work
- xTool Creative Space is widely praised as beginner friendly
- Fast 10000 mm/s with clean repeatable results
- Rotary attachment works well on curved surfaces
Cons
- Multiple owners report both lasers failing within about a month
- Calibration can drift and the adjust control is hard to reach
- LightBurn does not connect reliably on Mac
- Vent tube does not fit a standard 4 inch dryer vent
If your leatherwork sits next to hardware, this is the only machine here that handles both. The 20W diode side covers wood, acrylic, leather, glass, rubber and fabric, while the 20W fiber laser marks gold, silver, copper, stainless steel, brass and titanium. A leather goods maker who also personalises brass hardware does not have to own two machines.
The diode cuts up to 15mm wood and 12mm black acrylic in a single pass, and handles leather comfortably in the thin-to-medium range. The fiber side cuts 0.3mm stainless steel, 0.4mm brass and 0.2mm aluminium, and supports multi-level 3D embossing and deep engraving on metal, wood and rock.
The 16MP smart camera with shape recognition is the feature that speeds up leather batch work, since parts are auto-recognised and filled without manual nesting each time. xTool Creative Space and Artimind AI are consistently praised as more approachable than LightBurn, and there is a community library of 6,000-plus free design projects.
The enclosed cover filters strong light and there is a smoke extraction port, fire safety alarm and emergency stop button, which is the safety package a home craft room needs. Note the working area is only 220 by 220mm standalone, extendable to 220 by 500mm with the separately sold auto conveyor.
Where the F1 Ultra makes sense for leather
Leather plus hardware. Engraving a monogram on a leather tag and then marking the brass buckle in the same session, without swapping machines, is the workflow this exists for.
Beginner-friendly production work. The camera, auto-recognition and Creative Space mean you can set up a repeat leather order without learning LightBurn first, and xTool support responds within roughly a day and stands behind replacements.
Where the F1 Ultra gives us pause
Durability reports are the biggest warning. Multiple owners report both the fiber and diode lasers failing completely within about a month of moderate use, and calibration drifting over time with the adjustment control awkwardly placed behind the light shield. For a machine at this level, that is the main reason it sits eighth for leather specifically.
Software and fit issues add friction: LightBurn does not connect reliably on Mac, the desktop app paywalls its AI tools, firmware updates can break hotspot connectivity, and the included vent tube does not fit a standard 4 inch dryer vent. Safety glasses are not included.
How to Choose a Laser Cutter for Leather
Choose by what you cut, not by wattage alone. Marketing wattage is noisy in this category. Several machines labelled 40W deliver far less at the bed, so look at stated optical output where the manufacturer gives it. For leather, the useful question is how many passes a 3mm panel needs, and a machine that cuts in one pass will always give a cleaner edge than one that needs four.
Decide diode versus CO2 early. Every machine in this roundup is a diode or fiber desktop unit, which is the right call for leather at 1-3mm because diode lasers are cheaper per watt, need no chiller or water loop and are far easier to set up in a spare room. CO2 machines at 30W and above cut considerably thicker leather and remain the right upgrade once you are cutting belts and bag panels commercially. Our guide to CO2 laser cutters for craft studios covers that step up.
Size the bed to your panels. Measure the largest leather piece you intend to make, then add the surrounding waste you want around it. If that piece is a full wallet panel, a 300mm square bed forces you into tiled cuts with a visible seam line. The 600mm bed on the TTS-20 Max exists precisely for this reason.
Air assist is not optional for leather. Air carries heat away from the kerf instead of into the surrounding fibre, which is the single biggest lever on edge quality. Machines that include a pump, like the Longer RAY5, save you a purchase. Machines with only a reserved port, like the Twotrees, mean you add one later.
Plan the extraction before you buy. Leather smoke has a strong, lingering smell and you cannot filter it out with a window unit. All eight machines need somewhere to exhaust, and an enclosed cabinet only helps with light and fire, not with fumes. Budget for an inline fan and ducting regardless of which machine you choose.
Check the software before the hardware. LightBurn compatibility is the standard for anyone who designs their own files, while bundled apps are friendlier for beginners. Also check the operating system support, because LightBurn does not connect reliably on Mac with the xTool F1 Ultra. Buying a machine whose software you cannot run on your own computer is an expensive mistake.
Factor in the consumables and support. Leather dust is abrasive, so filters and a clean extraction path matter over years, and machines with a China-based support team answer more slowly than those with local support. If you are buying a machine as a gift for a leather hobbyist, a US or EU support line is worth more to them than extra wattage.
Related reading: if you later want to cut vinyl or decal material alongside leather, our guide to vinyl cutters for craft projects is the right reference for that class of machine.
How to Get a Clean Cut on Leather Without Scorch
Scorched edges are the most common leather complaint in the forums we read, and almost every thread converges on the same fix. A single slow, high-power pass generates enough heat to brown the fibre around the cut. Several fast passes do not.
Prep the hide first. Wipe the surface, and lightly mist the leather with water before cutting. The moisture absorbs heat and noticeably reduces scorching on veg-tan.
Run multiple fast passes. Use maximum speed with a power setting just high enough to mark, then repeat. Reviewers consistently report less burn at high speed than at low speed with high power.
Tune air assist first. Increase airflow before you increase power. Air is what removes heat from the kerf, and most scorch problems disappear once air assist is set properly.
Raise DPI. Above roughly 400 DPI, leather starts to scorch from dwell time alone. Stay at or below it for cuts, and only go higher for light surface engraving.
Use an offset outline. Where the design sits close to the edge, add a small kerf offset so the finished piece still fits your pattern.
Invert dark artwork. On brown or dark leather, inverting filled engraving areas and preprocessing the file as a bitmap gives visibly darker marks.
Finish after cutting. Clean with isopropyl alcohol, sand scorch with very fine sandpaper, then seal with beeswax, saddle soap or a friction polish to even out the edge.
Wetting the leather is the technique that appears constantly in question-and-answer threads and in almost no roundup we found. It is simple, it costs nothing, and it is the first thing to try when a cut edge browns.
Leather Safety: What You Must Never Cut
Never laser cut PVC or vinyl faux leather. It releases hydrogen chloride fumes, which are toxic and corrosive, and they will destroy the machine’s optics and metal parts. No filter makes this safe in an enclosed room.
Bonded leather is the grey area, because the term covers both real leather composites and synthetic imitations. If you cannot identify the binder, treat it as unsafe.
Vegetable-tanned leather is the safest and best-behaving type. Full-grain, top-grain, nubuck and suede all engrave well. Chrome-tan is common and engraves fine, but check it for any sprayed or polyurethane finish first.
Always extract. Leather smoke is unpleasant and, in a closed room, unhealthy. Run every job with extraction running and keep the exhaust path clear.
Frequently Asked Questions
What laser is best for leather?
The Longer RAY5 40W is the best all-round choice in our testing because its real 40W optical output and included air-assist pump give the cleanest through-cut on 4mm veg-tan with the least edge browning. For thin keychains on a smaller budget the ACMER S2 works, and for engraving only the LaserPecker LP2 has the finest spot.
Can I cut leather with a laser cutter?
Yes. Both diode and CO2 lasers cut leather cleanly, and fiber lasers engrave it without touching the surface. Leather is one of the easiest materials for a desktop laser because it marks dark and cuts at low power. The limits are thickness and bed size, not material compatibility.
What wattage laser is best for cutting leather?
For thin keychains and coasters up to about 2mm, a 7W to 10W diode is enough to engrave and cut. For wallet panels and bag parts in the 3-4mm range, aim for 20W to 40W of stated optical output so the cut happens in one pass. Above that, a CO2 machine at 30W and up is the right step up.
Which xTool is best for leather?
The xTool S1 40W is the better choice for leather because it has the larger 23.93 by 15.16 inch bed, so full wallet panels fit without tiling, plus an enclosed Class 1 cover and five flame sensors for a home craft room. The xTool F1 Ultra adds fiber engraving for metal hardware but has a much smaller 220 by 220mm area and durability reports worth weighing.
Should I wet leather before laser engraving?
Yes, lightly. A fine mist of water before cutting absorbs heat and noticeably reduces edge scorch on vegetable-tanned leather. It costs nothing, takes seconds and is the first fix to try when cut edges brown. Wipe the surface afterward so the machine bed stays clean.
Which material should you never cut in the laser cutter?
Never cut PVC or vinyl faux leather. It releases corrosive hydrogen chloride fumes that are toxic to people and destructive to the machine, and no exhaust filter makes them safe. Bonded leather of unknown composition should be treated the same way. Also avoid any unknown plastic and never cut bare metal with a CO2 laser.
How can I make my laser engraving darker?
Invert your artwork on dark or brown leather so you burn the background instead of the filled shape, and preprocess the file as a bitmap for more even contrast. Raise power slightly, lower speed, and keep DPI at or below roughly 400 to avoid dwell scorch. After engraving, sealing with beeswax or saddle soap deepens the contrast further.
Final Verdict for Leather Crafts in 2026
The best laser cutters for leather crafts split cleanly by project size. Take the Longer RAY5 40W if you want the best laser engraver for leather and real cutting depth in one machine, and it stays our pick of the eight for a reason. Take the xTool S1 40W if the machine lives in a family room and you want an enclosed cabinet and a bed that fits wallet panels. Take the ACMER S2 if you are testing the water with thin keychains, and the Twotrees TTS-20 Max if panel waste is costing you money.
Whatever you choose, budget for extraction, keep PVC faux leather away from the machine, and run several fast passes instead of one slow one. That single habit does more for your edges than any wattage upgrade.